I have a confession: I used to hate shiny brass. It felt dated in our 1970s Colonial, especially after painting walls white and updating to matte black hardware in the kitchen. Then I discovered a humble $12 spray can that changed how I look at thrift finds and builder-grade fixtures forever. This isn’t some miracle product — it’s real paint with real limitations — but when used right, it delivers a rich antique bronze look that punches way above its price tag. Here’s exactly how I used it and the results after years of living with it.
The Problem: Too Much Shiny Brass
When we started renovating, we had shiny brass door hinges, cabinet pulls from the original kitchen, and a few light fixtures that screamed 1977. Replacing everything with new matte finishes would have added hundreds to the budget. Instead, I started experimenting with spray paint on small pieces from my furniture flips.
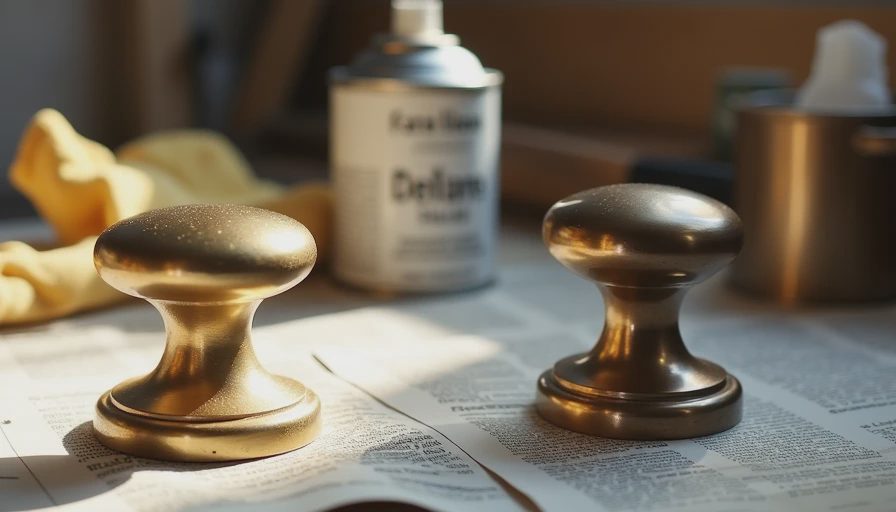
The winner? A Rust-Oleum spray in “Aged Bronze” or similar metallic finish. One can cost me $12 at the big box store.
Not everything needs to cost more. Some things just need to be thought about more — and sometimes that thing is a can of spray paint and a little patience.
The Process: How I Transform Brass (or Gold)
I’ve now used this technique on over a dozen pieces. Here’s the reliable workflow:
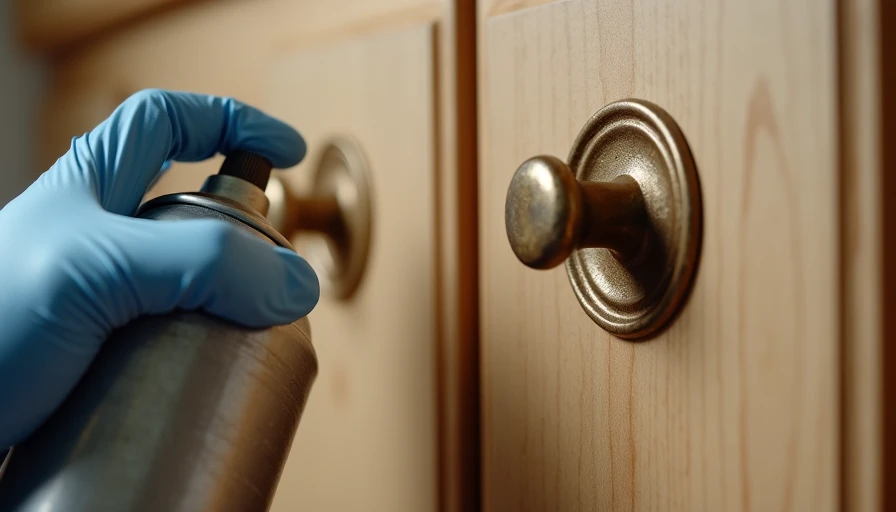
Prep is everything. Clean the hardware thoroughly with degreaser to remove oils and old polish. Lightly sand glossy surfaces with 220-grit for better adhesion. Tape off any areas you don’t want painted.
Application. Multiple thin coats are key — I do 3-4 light passes, waiting 5-10 minutes between each. Hold the can about 8-10 inches away and keep it moving. The paint builds a nice textured metallic look that mimics real aged bronze.
Cure and Seal. Let it cure for 24-48 hours, then hit it with a clear matte sealer for durability (another $8-10). This step prevents chipping, especially on high-touch items like cabinet pulls.
I tested it first on a cheap thrift store pull. Once I trusted the results, I moved to bigger projects.
Real Projects Where It Shone
Bathroom Vanity Hardware: The builder-grade brass pulls looked cheap against our new quartz. Two light coats turned them into warm antique bronze that matches the overall neutral palette. Still looks great after three years of daily use and wet hands.
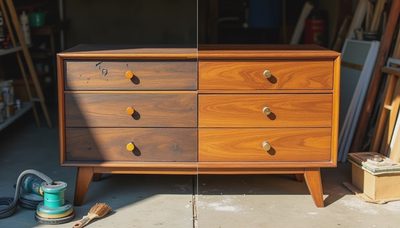
Mid-Century Dresser Pulls: The original brass was too bright for the walnut stain. The spray gave them depth and character that perfectly complements the refinished wood.
Light Fixture Accents: On a simple pendant, I painted just the metal parts. The transformation made the $89 Amazon light look custom.
Budget Breakdown: Ridiculously Cheap Wins
Spray can (Aged Bronze): $12
Clear matte sealer: $9
Sandpaper, degreaser, tape: $8
Total for multiple projects: under $40
Compare that to buying new antique bronze hardware: easily $4–$8 per pull. For a full set of kitchen cabinets, the savings are massive.
What I’d Do Differently and Honest Limitations
It’s not perfect. Heavy wear areas (like toilet flush handles) can show chips over time. The finish is more “faux aged” than real patina, so close-up inspection reveals it’s paint. Always test on inconspicuous areas first.
Next time I’d:
Use better ventilation — the fumes are strong.
Buy two cans for larger jobs to avoid running out mid-project.
Combine with real patina solutions for even more realistic depth on some pieces.
Why This Trick Fits Our Renovation Style
In Shop Talk I love sharing accessible ways to make your house feel better without big spending. This spray can supports the same “think it through” philosophy I use on bigger projects. It lets me iterate quickly on hardware choices and gives thrift flips a cohesive, elevated look.
Megan was skeptical at first, but now she points out pieces around the house that got the treatment. The kids don’t care, but I smile every time I open a drawer with the updated pulls.
Tips for Trying This Yourself
Work outside or in a well-ventilated garage.
Multiple thin coats > one thick coat.
Seal everything that gets touched often.
Combine with other finishes — I mix this antique bronze with matte black in the same room for interest.
Source cheap hardware on Marketplace specifically to practice.
This $12 can has saved me hundreds and made our house feel more intentional. It’s not about faking luxury — it’s about making thoughtful upgrades that fit our real life and budget.
If you have shiny brass that’s driving you crazy, grab a can and experiment on one piece this weekend. Worst case you spent $12 and learned something. Best case you get a fresh look that makes you love your house a little more.
Next in Shop Talk I’ll talk about my garage workshop that cost less than a nice sofa. Until then, go check your hardware. That old brass might just need a second chance.
— Ethan

No letters yet — be the first to write.