One lazy Sunday scroll through Facebook Marketplace changed our bedroom storage game. There it was: a sad, water-damaged mid-century dresser with missing handles, sticky residue, and a finish that looked like it had survived three decades of neglect. Price? Forty bucks. I hit “Message” before Megan could talk me out of it. Three hours later I was hauling it home in the back of my SUV. What followed was a very satisfying weekend project that taught me more about patience than any YouTube tutorial ever could.
The Find: Why This Dresser Was Worth Saving
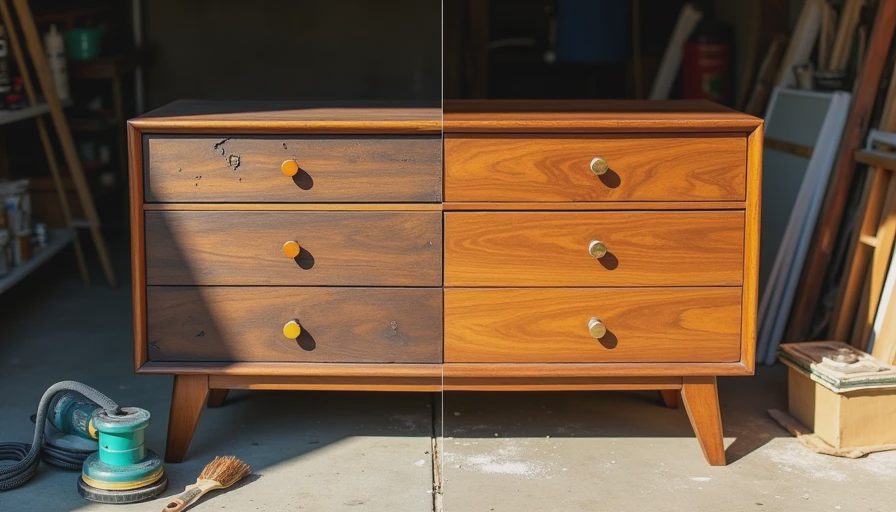
The piece was classic 1960s mid-century — clean lines, tapered legs, three wide drawers, solid wood construction under all the grime. Most of the damage was surface-level: years of cigarette smoke, water rings, and someone’s failed attempt at refinishing with the wrong product. But the bones were excellent. At $40 it was cheaper than a single nightstand at IKEA, and way better quality.
I’ve been flipping furniture on the side for a couple years now. It started as a way to furnish our 1977 Colonial without blowing the renovation budget and turned into a relaxing garage escape from toddler chaos. This dresser became my favorite project so far.
The Assessment: What We Were Up Against
Back in the garage I took stock. Drawers stuck. Veneer peeling in one spot. Years of wax buildup and mystery stains. The hardware was original but tarnished and incomplete. Nothing structural was broken — that’s the key with these flips. If the frame is solid, the rest is just elbow grease and smart choices.
I snapped before photos from every angle (always document this stuff — you’ll want the comparison later). Then I made a game plan and a small shopping list.
Not everything needs to cost more. Some things just need to be thought about more — and sometimes that thing is a neglected piece of furniture with great potential.
The Full Refinish Process — Step by Step
Step 1: Stripping the Old Finish
I used a citrus-based stripper (low odor, kinder to the garage air) and let it sit in sections. Scraped off layers of old varnish with a putty knife. This part is messy but weirdly satisfying. Pro tip: wear gloves and work in good ventilation. I learned the hard way that rushing this leaves residue that haunts the next steps.
Step 2: Sanding and Repairs
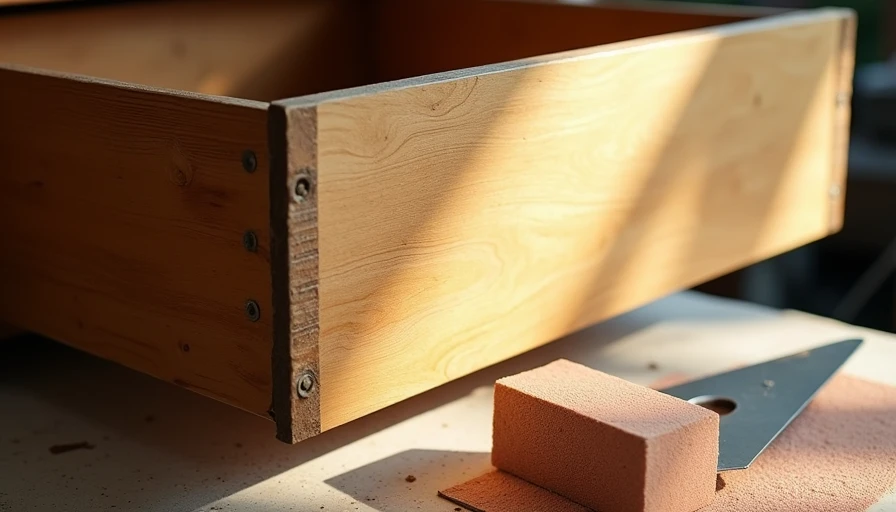
Started with 80-grit to remove the worst damage, then moved to 120, 220, and finally 320 for a smooth finish. Fixed the peeling veneer with wood glue and clamps. Filled a couple small dents with wood filler. The tapered legs needed extra love — years of being dragged across floors had left them scuffed.
Step 3: Cleaning and Prep
Degreased everything with mineral spirits. This is the boring but critical step nobody posts about. Skimp here and your new finish won’t stick properly.
Step 4: Staining and Sealing
I went with a medium walnut stain to bring out the grain and give it that warm vintage feel. Two coats, then a clear satin polyurethane for protection. The kids are rough on furniture, so durability mattered.
Step 5: New Hardware
Replaced the missing pulls with simple brass ones I found on Amazon for $18 total. They complement the wood perfectly without looking brand new.
Total time: about 12 hours spread over a weekend. Total additional cost: around $65 for supplies and hardware.
Budget Breakdown: The Real Math
Purchase price: $40
Stripper, sandpaper, wood filler: $22
Stain and poly: $28
New pulls: $18
Misc (rags, gloves, etc.): $7 Grand total: $115
Now compare that to a similar new dresser: easily $400–$800. And this one has soul.
What I’d Do Differently Next Time
Test the stain on a hidden spot longer. The first coat looked too dark until it dried fully.
Invest in a better orbital sander earlier — my old one died halfway through.
Take more progress photos. The transformation is dramatic but I wish I had better in-between shots.
Consider a matte finish next time. Satin looks great but shows fingerprints a bit more in a bedroom.
How It Looks and Works Now
The dresser sits in our primary bedroom and gets daily use. It holds Megan’s teaching materials, my random socks, and the kids’ overflow clothes. The warm walnut tone plays beautifully with our white walls and the new flat-panel cabinets we installed earlier. Every time I open a drawer I feel a little proud — not because it’s perfect, but because it’s ours and it was saved from the landfill.
Friends ask where we got it. When I tell them the story they usually say, “I need to start looking on Marketplace.” Exactly. That’s the point.
Why Furniture Flipping Fits Perfectly Into Our Renovation Life
In the Shop Talk category this is what I love sharing: practical ways to make your house better without huge spending. These projects keep me sane during bigger renos, teach real skills, and deliver that dopamine hit when something ugly becomes useful again. Plus, it’s a great way to practice the same “think it through” mindset I use on the big house projects.
If you’re nervous about starting your first flip:
Begin with something small and solid.
Watch the piece for a few days before buying — check for structural issues.
Start in a well-ventilated space with basic tools.
Don’t aim for museum quality. Aim for “better than it was and useful in my house.”
This $40 dresser proved that good design decisions happen at every price point. You just have to be willing to put in the thinking (and the sanding).
Next in Shop Talk I’ll share five tools under $100 that made every reno project easier. Until then, open Marketplace, set some alerts for “mid century dresser,” and see what you find. Worst case you spend an afternoon in the garage. Best case you get a piece you’ll love for years.
— Ethan
No letters yet — be the first to write.